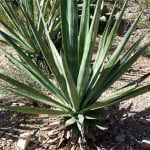
Moringa oleifera, locally called as “Sohanjna”, a member of family Moringaceae, is a divine gift bestowed to the mankind for its extra ordinary morphological, physiological and nutritional attributes. It is a widely populated plant which is native to India and Pakistan and is being cultivated around the world as a tree plant and field crop in some African and Asian countries. It is being cultivated by both through stem cuttings and seeds.
i) Asexual Propagation (Through Stem Cuttings)
Mature stems or branches are used as cuttings for asexual propagation. For this purpose following steps are followed.
1- Take a 6 feet long and 2 inches in diameter mature woody branch or stem of two years old trees.
2- Dig a pit of 1 cubic meter (1x1x1).
3- Place two third part of cutting in this pit and fill it with a mixture of soil, sand and compost preferably green manure and affirm the cutting from the base to avoid shaking.
4- Make a dome around the stem cutting to protect the cutting from direct hit of water.
5- Water charitably, but do not drown the cuttings in water.
6- Put some cow dung on the upper tip of the cutting to avoid water losses through respiration and protect the stem from insects and pests attack.
ii) Sexual Propagation (Through Seeds)
Moringa seeds have no dormancy periods and can give 90-100% germination when planted as soon as they are mature and they have the ability to germinate even up to one year but the germination percentage goes down. The following steps should be carried out during direct seeding.
1- Light sandy loam and well prepared site should be chosen.
2- Make and keep the soil wet enough that the top soil should not get dry before seeding but not too wet the seeds drown in the water and struck by root rot.
3- Generally moringa does not require any additional fertilizer but pre sowing fertilizer NPK can be applied in the field.
4- Planting density can be kept at 100,000 plants per hectare (10×10 cm) out of which 60,000 plants can survive after two years.
5- Prefer to sow fresh mature seeds.
6- Soak the seeds in aerated water for 8 hours to enhance the germination rate.
7- Place the seeds 2 cm deep in the soil by drill method.
8- Prefer to place 2 or 3 seeds in one hole to avoid less number of plants.
9- After one month, keep only one plant in each hole to avoid competition.
10- Use any effective termiticide because temites are big danger to the moringa young saplings.
iii) Transplantation
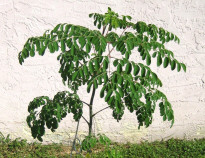
Moringa seeds are sown in plastic trays in a mixture of soil, sand and green manure. When the plants reach at the age of one week, those can be transplanted in the big containers. It is very tedious job which requires a lot of care especially in respect to moringa seedlings due to their fragile nature. Moringa seedlings respond to stress conditions when being transplanted from plastic trays or bags because they receive new edaphic conditions. When the seedlings are transplanted in the containers, those come under stress but due to their strong adaptability nature, this stress is in two weeks approximately.
Before transplanting the seedlings, some precautions should be kept in mind.
1- Water the plants in the container.
2- Disturb the plant root system as little as possible.
3- Transplant the seedlings late in the day, so they can recover themselves all at night.
4- If possible, place the containers under florescent lights for some days after transplantationa) Steps in Transplanting in containers
1- Fill the pot or container with a mixture of soil, sand and green manure two inches below the top container.
2- Water the container soil and saturate it with water containing commercial fertilizer if possible.
3- Dig out a hole in the container to place the moringa seedlings.
4- Plant the seedling carefully with much attention to avoid root damage.
5- Fill the hole gently with soil and firm it around the roots.
6- Once again water the container but not waterlog the soil.
7- Place the container in day light or under florescent lights for some days.
b) Steps in Field Transplantation
1- Prepare the field and saturate the soil before transplantation and apply fertilizer.
2- Dig out holes in the field at 30×45 cm.
3- Transplant the seedlings late in the day afternoon.
4- After transplantation, water the field but not waterlog the soil.
5- If plants are not erect, then stake them with stick until they get firmed themselves.
iii) Cultivation under marginal lands
Moringa seeds and stem cuttings cannot be grown in waterlogged soils due to chances of root rot. So, in waterlogged and high rainfall receiving areas, the seeds and cuttings are planted by making small mounds to protect them from waterlogged conditions. Same practice can be applied in salt affected soils to avoid salt stress. Moringa can easily germinate in salinity up to 4 dS/m but on later growth stages, it can tolerate salinity up to 8 dS/m. In drought or low rainfall receiving areas, moringa trees can be irrigated by drip irrigation method. The distance between two holes can be kept at 20 cm. This one drip hole is sufficient for four plants at 10×10 cm. Long taproot of Moringa oleifera makes it resistant to drought and can intake more water from deep soil.
This is a brief overview of moringa plantation methods. I hope, this will help all moringa friends.